Hey Y’all,
Here’s what I’ve been up to this past week.
I have had so many people ask me to reopen my 15 Recipes for your Herbal Medicinal Remedies Apothecary Cabinet course that I decided to go ahead and open earlier than I had planned. And with a couple of changes I think for the better.
Change #1-
Read more...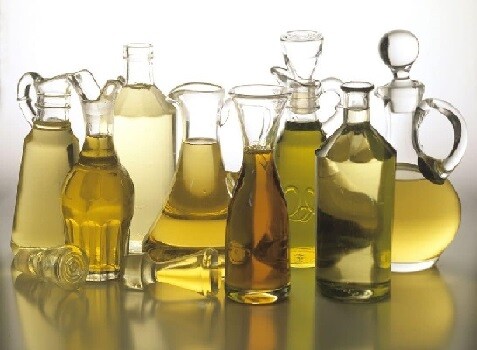
I think it depends on how you want to use it and for which area of your body. I like olive oil for pain salves and jojoba oil for my face creams.
Rating Scale
5 – Very Slow Absorption Rate
Feels heavy, leaving an oily protective barrier on the skin.
4 – Slow Absorption Rate
May feel sticky or waxy before warming at body temperature. Leaves a slight oily residue on the skin.
3 – Average Absorption Rate
Leaves a slight oily or satiny finish.
2 – Fast Absorption Rate
Feels light, absorbs into the skin readily, leaving a silky smooth finish.
1 – Very Fast Absorption Rate
Considered a “drying oil” quickly absorbed by the skin and does not leave an oily feel.
Abyssinian – 1
Almond, Sweet Organic – 3
Aloe Vera (Macerated) – 3
Andiroba – 2
Apricot Kernel – 2
Argan (Virgin) – 3
Avocado (Extra Virgin) – 4
Babassu – 3
Baobab – 1
Black Cumin Seed – 3
Black Current Seed – 3
Borage Seed – 5
Broccoli Seed – 3
Camellia Seed – 2
Canola – 2
Carrot (Macerated) – 4
Castor – 5
Cherry Kernel – 3
Chia Seed – 3
Chili Seed – 3
Coconut – 4
Cotton Seed – 4
Evening Primrose – 5
Flax Seed – 5
Grapeseed – 2
Hazelnut – 1
Hemp Seed – 3
Jojoba – 3
Macadamia – 5
Marula – 2
Meadowfoam – 2
Moringa – 2
Neem – 5
Oat – 4
Olive – 3
Palm – 5
Passionfruit – 2
Peach – 3
Perilla Seed – 2
Pomegranate – 3
Pracaxi Seed – 3
Prickly Pear – 2
Pumpkin Seed – 3
Raspberry Seed – 3
Ricebran – 3
Rose Hip – 1
Sacha Inchi – 1
Safflower – 2
Sea Buckthorn – 3
Sesame – 3
Soya Bean – 3
Sunflower – 3
Sunflower (Organic) – 2
Tamanu – 3
Walnut – 3
Wheat Germ – 3
I hope that this helps you decide which carrier oil to make the best products for you and your family.
Love ya,
Deb
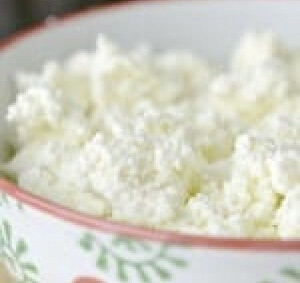
Easy Homemade Ricotta Cheese
Learn how to make ricotta cheese at home in just 5 minutes and never buy it from the store again!
Ingredients
- 2 cups Whole Milk
- 2 Tablespoons Vinegar lemon juice will work
- pinch of salt
Instructions
- Start by prepping your draining bowl. Stretch some unbleached cheesecloth over the edge of a bowl and secure it with a rubber band.
- Place your milk and the pinch of salt in a saucepan on the stove top. Turn the burner on a low-medium heat and place a candy thermometer in the pan. Stir occasionally until the temp reaches 165ºF.
- Once the milk reaches 165ºF, turn off the heat and add the vinegar. Give it one little stir, just enough to move around the vinegar and let the whole mixture sit for a minute or two.
- Pour the mixture into your prepared bowl slowly and gently.
- Let the cheese set on the counter for about 20 to 30 minutes to drain.
- Once the homemade Ricotta Cheese has drained you can place it in the fridge in an airtight container until ready to use or you can use it right away!
Recipe Notes
This recipe makes about 1/2 cup of homemade ricotta cheese per 2 cups of milk used and will store for a few days in the fridge, but make sure to use it up within a week. Extra homemade Ricotta Cheese can be frozen for later use
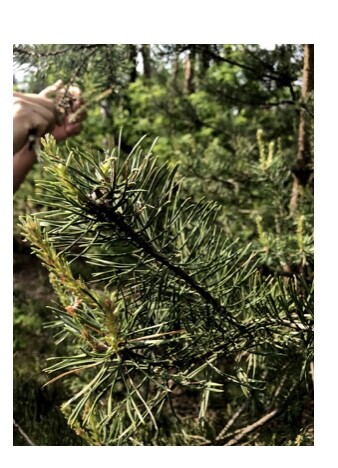
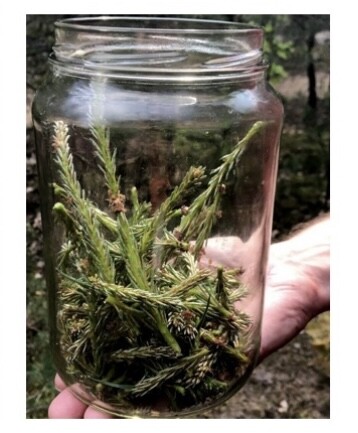
Pine Tips Syrup for coughs
If it’s May, y’all know I’m starting my syrup from pine tips, or you can use spruce tips. Pine Tips Syrup helps to heal cough and boost your immune system in the fall.
INGREDIENTS
- jar pine tips – only this year’s young tips, the youngest and the greenest
- 1 1/2 cup sugar
Remember to only collect tips away from roads. Be kind to the trees you use – do not take all the tips from one twig, you want to allow the tree to keep growing. I also found few green cones and threw them in too.
Clean tips by laying them out on a white cloth for a few hours, allowing any insects to remove themselves. Do not wash or rinse them with water, you don’t want to wash away the pollen.
You can cut tips and cones into smaller pieces. Place a layer of greens and cover it with sugar, add more greens and cover with more sugar. Repeat layers until your jar is full or you run out of tips. Tighten the lid down.
Place a jar in the window and let the sun work for 4 weeks. Give your jar a shake every couple of days. You’ll want to open the jar every 1-2 days, to let the gases out. I call it burping the jar.
After 4 weeks your syrup should be ready. Strain it through a kitchen cloth to get a clear syrup and pour it to jars. It can be stored till next Spring in the fridge or cold basement/pantry.
How to use it:
- take a spoonful of syrup a few times a day when you got cough
- add a spoon of syrup to your tea
- you can have it with your pancakes or oatmeal

#finishingsalt #recipes #cooking